Step 1: Composting Unmasked – The Basics You Need to Know
Think of composting like a superhero team-up, but with organic matter. You’ve got your “browns” (carbon-rich materials) like fallen leaves, paper, and wood chips. Then there are your “greens” (nitrogen-rich materials) – these are your kitchen scraps, coffee grounds, and freshly cut grass.
Air and water are the unsung heroes that keep your compost party going. A well-aerated pile allows beneficial microbes to break down your materials efficiently. It’s like inviting the cool kids to your party to get the dance floor moving. And water? Imagine your compost pile as a thirsty sponge. It needs just the right amount of moisture – not too dry like a cracker, and definitely not soggy like a wet towel.
Decomposition at Its Finest Composting is like nature’s way of hitting the recycle button. When you toss your banana peels and eggshells into the mix, you’re providing a buffet for an army of tiny organisms – from bacteria to fungi to insects. They work together to break down the materials into nutrient-rich humus that your plants can’t get enough of.
The “Hot” and “Cold” Composting Debate
Now, let’s talk about temperatures. No, we’re not discussing the latest weather forecast – we’re diving into the “hot” and “cold” composting methods. Hot composting involves maintaining higher temperatures (around 130-160°F or 55-70°C) in your pile, which speeds up the breakdown process. Cold composting, on the other hand, takes its sweet time, relying more on nature’s pace to do the job.
Hold Onto Your Gardening Gloves
Composting isn’t an overnight affair. Depending on your method, weather, and what you throw into the pile, it can take anywhere from a few months to a year for your compost to fully mature. It’s like waiting for a gourmet meal to cook – the end result is worth the patience.
Fear Not the Smell!
Don’t let the fear of a stinky pile discourage you. A well-maintained compost pile shouldn’t reek of rotten garbage. Properly balanced, aerated, and moistened piles smell earthy and fresh, like the scent after a good rain.
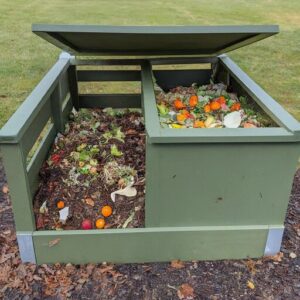
Step 2: Choosing Your Composting Style: Bin or No Bin?
Are you more of a DIY dynamo or a “let’s keep it tidy” kind of person? We’re breaking down the pros and cons of composting in a bin versus going commando (compost-wise, of course).
Compost Bin: Pros
Neat and Tidy: Compost bins keep your compost organized and contained, preventing it from spreading around your yard.
Faster Decomposition: Bins provide better insulation and control over the composting environment, leading to faster decomposition.
Less Maintenance: Bins require less frequent turning and monitoring compared to open piles, making them suitable for busy individuals.
Rodent and Pest Control: Bins can offer better protection against rodents and pests.
Compost Bin: Cons
Cost: Purchasing or building a compost bin can be an upfront expense, especially if you opt for a larger or more specialized model.
Space: Bins take up space, and if you have a small yard, finding the right spot can be a challenge.
Limited Air Circulation: Some bins might not provide as much airflow as an open pile, potentially leading to slower decomposition.
Temperature Regulation: Bins can trap heat, leading to higher temperatures that may be unsuitable for certain types of composting.
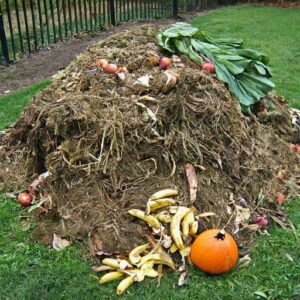
Compost Pile: Pros
Low Cost: Starting a compost pile requires minimal investment – all you need is space.
Natural Airflow: Piles generally allow for better air circulation, which can facilitate aerobic decomposition.
No Space Restrictions: You’re not limited by the size of a bin, so you can compost larger quantities.
Flexibility: You can adjust the size and layout of your pile to accommodate your specific needs.
Compost Pile: Cons
Aesthetics: Open piles can look messy and might not be visually appealing in some landscapes.
Slower Decomposition: Piles might take longer to break down materials compared to compost bins, especially if not turned regularly.
Pest Attraction: Without proper management, open piles can attract pests like rodents and flies.
Maintenance Intensity: Piles need more frequent turning and monitoring to ensure proper decomposition and temperature control.
Ultimately, the choice between a compost bin and a pile depends on your preferences, available space, and level of commitment. If you prioritize neatness and faster results, a bin might be the way to go. On the other hand, if you have ample space, want a budget-friendly option, and don’t mind a bit more hands-on involvement, a compost pile could suit you better.
Step 3: Collecting the Green and the Brown – The Ingredients for Compost Success
Let’s talk trash – in a good way. We’re rounding up the superstars of composting: your kitchen scraps (greens) and those fallen leaves (browns) that you’ve been eyeing suspiciously. We’ll teach you how to make them the best of friends.
Browns: The Carbon Stars
Think of browns as the foundation of your composting masterpiece. These carbon-rich materials provide structure and aeration to the pile. Key ingredients include:
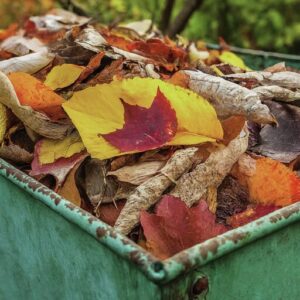
Fallen Leaves: Like crunchy brown blankets, they bring carbon to the mix.
Straw: Perfect for adding fluffiness without overloading on nitrogen.
Paper/Cardboard: Shredded newspapers and cardboard add carbon and help balance moisture.
Greens: The Nitrogen Heroes
Greens add the nitrogen punch, heating up your compost party and providing essential nutrients. Here’s who’s on the guest list:
Kitchen Scraps: Fruit and veggie peels, coffee grounds, eggshells – they’re all VIPs.
Grass Clippings: Freshly mowed grass brings nitrogen and moisture, but don’t dump too much, or it could get soggy.
Plant Trimmings: Pruned branches and leaves contribute nitrogen and diversity.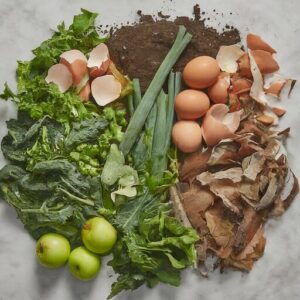
Step 4: Layering Like a Pro – A Symphony of Browns and Greens
Move over, gourmet chefs – there’s a new layering game in town. We’re talking about piling up your greens and browns like a pro, creating the ultimate composting symphony. Spoiler: This symphony doesn’t involve violins.
Start with Browns
Begin with a layer of carbon-rich “browns.” This helps provide structure, prevent odors, and ensure proper aeration. Use items like shredded paper, leaves, twigs, or straw as your base.
Add Some Greens
On top of the browns, add a layer of nitrogen-rich “greens.” These include kitchen scraps, coffee grounds, and fresh plant clippings. Greens provide the essential nutrients and energy that kickstart the composting process.
Keep Alternating
Repeat the layering process, alternating between browns and greens. A general rule of thumb is to maintain a 2:1 ratio of browns to greens. Chopped materials decompose faster, so give them a rough chop before adding them to the pile.
Aeration
As you layer, fluff up the materials a bit to allow for air circulation. Think of it as gently mixing the salad – you want everything to have room to breathe.
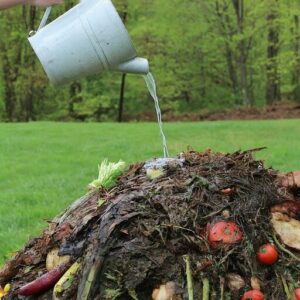
Water as You Go
Lightly moisten each layer as you add it to the pile. The moisture helps the microbes thrive and do their decomposition dance. It’s like giving your ingredients a refreshing spritz before baking.
Top Off with Browns
Finish off your compost “lasagna” with a top layer of browns. This helps cover the pile, preventing pests and odors. Think of it as tucking in your compost for a cozy nap.
Repeat Until Full
Keep layering until your compost bin or pile is full. The key is to maintain that balanced ratio of browns to greens throughout the process.

What Not to Compost
Meat and Dairy Products
Adding meat or dairy will result in your compost pile becoming a gourmet buffet for scavengers.
Oily or Greasy Foods
Grease in your compost? Not good. Skip the oily foods.
Diseased Plants
Composting diseased plants is like inviting the neighborhood cold to your garden shindig. Let’s keep the party healthy.
Weeds with Seeds
Weeds with seeds in your compost? Forego anything that will result in unwanted guests in your garden.
Pet Waste
Pet waste in your compost pile? Aside from possible pathogens and parasites, do you really want doggie poo comingling with your salad ingredients?

Colored or Glossy Paper
Adding colored or glossy paper to your compost will be a mess, but not a good one. They contain chemicals that aren’t good for soil.
Diseased or Insect-Ridden Plants
Insect-ridden plants in your compost? It’s like inviting the neighborhood pests for a sleepover. Your garden won’t thank you for the extra company.
Charcoal Ash or Coal Dust
Imagine your compost pile dressed in smoky attire – that’s what charcoal ash does. Stick to wood ash and keep your compost party stylish.
Plastics and Synthetic Materials
Plastics at a compost party? That’s like showing up to a black-tie event in pajamas. Keep it organic.

Citrus Peels (in Excess)
Citrus overload in your compost? Your pile might become the ultimate citrus juice bar. A little zest is okay, but let’s not overdo the citrus splash.
Black Walnut Leaves and Twigs
Black walnut leaves and twigs release substances that may be toxic to some plants you may try to grow.
Remember, composting is a delicate art – mix the right ingredients, and your garden will be dancing with delight. Leave out the party crashers. 🎉🌱
Step 5: Turning and Churning
Give your compost a workout with regular turning. We’re not talking about breakdancing, but close enough. Discover how a little mixing and fluffing can turn your compost pile from meh to magnificent.
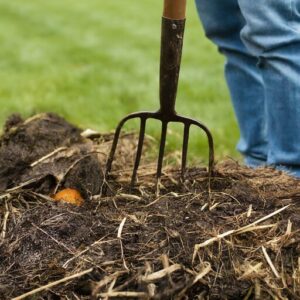
When to Turn
Plan to turn your compost pile about every 1 to 2 weeks. Turning too often can disrupt the decomposition process, while turning too infrequently might slow it down.
Mix It Up
As you turn, mix the outer materials with the inner core. This ensures that all parts of the pile get exposed to air, moisture, and the microbes that are doing the decomposing magic.
Check Moisture
While turning, pay attention to the moisture content. If the pile feels too dry, you can add a bit of water as you turn. If it’s too wet, incorporate more browns to balance it out.
Monitor Temperature
If you’re into the science of composting, you can monitor the pile’s temperature. Turning the pile can help distribute heat more evenly, promoting efficient decomposition.
Layers Matter
As you turn, maintain the layering balance of browns and greens. If you notice the pile smelling bad or taking longer to break down, adjust the balance during turning.
Repeat the Process
Keep turning your compost pile regularly, alternating the direction you turn. This helps ensure thorough mixing and proper aeration.
Remember, turning your compost is like giving it a little TLC. The goal is to create a healthy environment for the microbes to do their job efficiently. So, suit up with your composting cape and give your pile that superhero treatment! 🦸♂️🌱
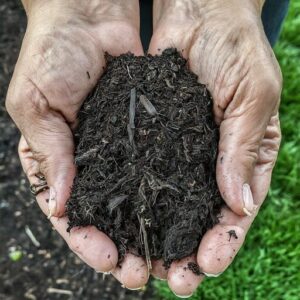
Step 6: The Grand Finale – Using Your Compost Gold to Boost Your Garden
Drumroll, please! Your compost is ready to take the stage. We’ll show you how to use your compost gold to give your garden superstar treatment. Say goodbye to lackluster soil and hello to the garden of your dreams!
Using compost in your garden is like giving your plants a luxurious spa treatment. It enriches the soil, improves plant health, and creates a thriving ecosystem. Here’s a detailed guide on how to make the most of your nutrient-rich compost:
Timing Is Everything
Apply compost in the spring or fall when you’re preparing your garden beds. This gives the compost time to integrate with the soil before your plants’ growing season.
Prepare the Soil
Before applying compost, loosen the soil in your garden bed with a garden fork or tiller. This helps the compost mix better with the existing soil.
Spread the Goodness
Spread a layer of compost about 2 to 3 inches thick over the soil surface. Think of it as giving your garden a cozy blanket made of nutrient-rich goodness.
Mix It In
Gently work the compost into the top 6 to 8 inches of soil. You can use a shovel or a garden fork to incorporate the compost thoroughly. It’s like folding ingredients into a cake batter.
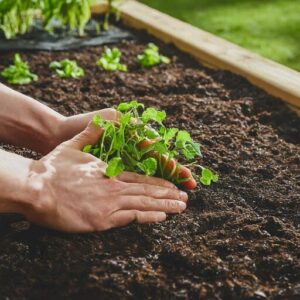
Mindful Planting
Plant your seeds or transplants in the newly enriched soil. The compost provides a buffet of nutrients, promoting strong root development and healthier plants.
Mulch
After planting, add a layer of organic mulch like straw or wood chips. This helps retain moisture, regulate soil temperature, and prevents weed growth.
Side Dressing
For existing plants, you can side dress them with a thin layer of compost. Apply it around the base of the plant, keeping it away from direct contact with stems or leaves.
Watering Routine
Water the area thoroughly after applying compost. This helps the nutrients from the compost seep into the soil and reach the plant roots.
Repeat the Process
Every year, continue to add compost to your garden beds to maintain soil fertility. Over time, you’ll notice improved soil structure, better drainage, and increased water-holding capacity.
Avoid Overdoing It
While compost is fantastic, too much of a good thing can be harmful. Applying excessive compost can lead to nutrient imbalances or waterlogged soil. Stick to the recommended amounts.
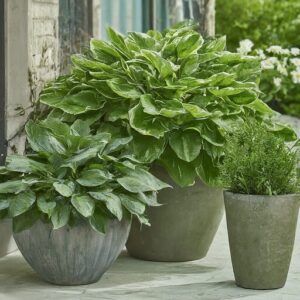
Container Gardening
For container plants, you can mix compost with potting soil to create a nutrient-rich blend. Use about 1/4 to 1/3 compost in the mix.
Compost Tea
If you’re feeling adventurous, you can make compost tea by steeping compost in water. Use the strained liquid as a foliar spray to provide a nutrient boost to your plants.
And just like that, you’ve gone from compost clueless to compost connoisseur in six easy steps! So, whether you’re cultivating a garden paradise or just want to impress your plants with your newfound composting skills, you’re now armed with the knowledge to do so. Go forth, compost champion, and let the soil enrichment extravaganza begin! 🌱🎉
P.S. Sign up for our Giggles and Gloves Newsletter below for more great gardening tips, and learn more about homesteading by clicking here!
